This tutorial will create a three-tiered skirt. Again, Squirrel wears about a size 3T or 4T, but this can easily be adjusted for bigger or smaller ladies. In fact, the same basic idea should work for adults too, and one of these days, if I can actually nail down the fabrics I want, I will make myself one too.
For the three tiers, you can use the same fabric, two alternating fabrics, or three completely different fabrics. For this size, you will need a fat quarter for each tier. I chose two fat quarters in a rose print, and one in a coordinating green-on-green floral.
Start by using the center fold, lengthwise, to cut the fat quarters in half.
If you are making the skirt for a shorter kiddo, this is also a good place to cut off some of the width. I cut about 3 inches from each set after I cut them in half. (Though admittedly, if you just cut 3 inches off the end with the fold, you could save yourself some quality time with the scissors.)
Next, sew the sides of one short end of each set of halved fat quarters (with the right side of the fabric facing inward...somehow, every time I make one of these skirts, I get at least one set backwards).
Essentially, you are making strips that are now twice as long, with a seam down the middle.
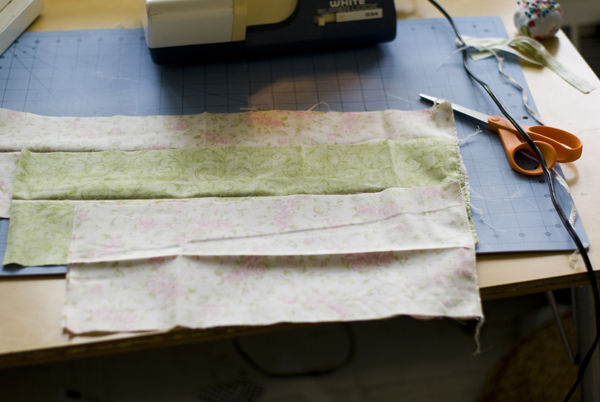
Then, cut two of the sets down on their open ends. Leaving one set at the original length, I cut the next set down three inches, and the third set down to three inches less than the middle set.
Now adjust your stitch length and tension so that we can get some gathering happening.
You want a long straight stitch, probably as long as your machine will make.
And you want to turn the tension up as well.
These two things combined will cause your fabric to gather.
Leave your shortest strip alone, but then stitch along the one side of your other two strips.
This gathering will help you match up the lengths as you put your tiers together.
After you have gathered the fabrics, you need to work with it to get the tiers to match up.
Pin the seams together, and then slide the fabric on either side of it along the thread to get the length right. The long stitch should make it easy to move the gathers back and forth.
Once you've got it matched up, sew the gathered tier to the straight edge of the tier above it.
Repeat this for the next tier as well.
This should leave you with three layers, with each longer tier nicely gathered.
Sew up the seam on the opposite side of the skirt now.
You're almost done!
Cut a piece of elastic about 2 inches shorter than the waist measurement of your recipient, and stitch it to the waist. (I used the serger, but you can also use a zig-zag stitch.)
Create a rolled hem by folding the edge under about 1/2 inch, and then folding it another 1/2 inch again.
Use a straight stitch (don't forget to fix the tension and bring that stitch length back down!) to hem close to the edge of the fold.
Roll down the waistband elastic in the same way, and finish off with a nice long zig-zag stitch.
Easy peasy! You're done!
Now for the hard part--catching your model in it before she takes off!
Enjoy!


Cute skirt, interesting nail polish :)
ReplyDeleteCan't wait to see you guys--I think A may be a little taller than our shrimpy T-Rex. We'll have to see!